There’s a lot to remember when inspecting brakes; fleets need to make sure everything is operating properly, and that potentially costly CSA violations can be avoided. Fleet Equipment polled our experts from our CSA brake story on the steps they recommend taking in a brake inspection.
According to Jeff Wittlinger, business unit director of wheels and braking systems at Hendrickson, there are several key steps to follow during a brake inspection, and they are as follows:
- Park on a level surface and ensure the vehicle wheels are chocked to prevent vehicle movement.
- When measuring brake stroke, the parking brake should be released and the brake pressure gauges should be at 90-100 PSI. With the engine off, and the brake fully applied, the maximum stroke (depending on the brake chamber type) should be less than the value specified by the North American Out-of-Service limits published by CVSA.
- Look for damaged, loose or missing components.
- Verify the brake components are moving freely when the brakes are applied, and investigate the reason for slow or no movement in those components.
- Check for excessive wear, especially on the camshaft tube bushings on a drum brake and the caliper guide pin bushings for a disc brake. In addition, for air disc brakes, ensure that boots and seals are in good condition.
- Measure brake lining thicknesses to ensure they are within acceptable range for efficient and proper operation. Drum brake lining friction material should be more than ¼ in. thick, while the friction material thickness on a disc brake pad should be more than 1/16-in. thick.
- Verify the ABS sensor contacts the tone ring to ensure it receives a good signal. A poor signal or no signal can cause the ABS to operate the warning lamp. During the recent CVSA Brake Safety Week, 8% of trucks and 15% of trailers were found to have an ABS violation.
“Brake shoes should be carefully inspected for defective lining conditions,” recommends Dennis Griffin, product manager of commercial vehicle friction for Federal-Mogul Motorparts. “Particular attention should be given to cracks, oil/grease contamination and lining thickness. These are easily observed during a roadside CSA inspection and may lead to a citation.”
 “If a drum-braked wheel-end equipped with an automatic slack adjuster is out of adjustment,” says Keith McComsey, director of marketing and customer solutions for Bendix Spicer Foundation Brake LLC, “Bendix’s most important piece of advice is this: Do not manually adjust the adjuster. There are many factors that can cause an automatic slack adjuster to overstroke, but none of these will be remedied with a manual readjustment. Refer to the manufacturer’s instructions to determine whether the slack adjuster is properly adjusting the brake.”
“Check to ensure that the power stroke is within legal limits, and that the free stroke is within the manufacturer’s recommended limit,” recommends Greg Sturdy, director of wheel end product engineering for Accuride. “Gunite agrees with the TMC’s suggestion of 3/8-in. as the lower limit. You should also compare power strokes to determine any imbalance across the system (both across axle and axle vs. axle). Check components for improper alignment and to check for any missing items. Look at the system as a whole critically and methodically. Just because you are doing a service or change of one component doesn’t mean that other components in the system are in good shape. Use repair and replacement as an opportunity to conduct a complete check of your brake system.
“Keeping components clean is vital,” he continues. “The brake system has lots of moving and static joints that can cause issues in system performance. Hub-drum, hub-rotor and hub-wheel mounting surfaces are frequent culprits of wear, damage and corrosion. Keep these joints clean and free of debris, and ensure that they have a properly aligned fit.
“Constantly look for signs of corrosion and evaluate against the proper specifications,” he adds. “If something looks out of compliance, clean the component or discard and replace them, when necessary, so as not to create a performance or safety issue.
“Perform a function test on your brake system using a reference point (i.e. paint pen marking, etc.) to check for rotation and movement when actuating the brakes,” concludes Sturdy. “Make sure that you have the proper tools for the job, including a torque wrench for final wheel nut torque. The system check is a great opportunity to address any and all leaks at valves, canisters, bearing seals, etc.”
When it comes to brake friction, McComsey of Bendix advises fleets to take the following steps:
- Check friction for cracks or missing pieces, ensure adequate thickness, and examine drums and rotors for signs of dragging brakes or overheating linings. Signs include grooving on air disc brake rotors or leopard-spotted patterns on drums.
- Also watch for uneven friction wear, particularly on drum brakes, where it can indicate a deformation in the brake shoe, decreasing brake performance and shortening friction life.
- When relining brakes on vehicles affected by federal Reduced Stopping Distance (RSD) regulations, ask suppliers for evidence of compliance: Not all replacement friction marketed as acceptable under RSD will actually perform to the standard.
- When in doubt, replacing OEM like-for-like is the most effective way to meet the RSD requirements in effect at the time of manufacture.
- As for the air system, these are the recommendations of Richard Nagel, director of marketing and customer solutions, air charging, for Bendix Commercial Vehicle Systems LLC:
Maintain air quality: Air seals, brake modulating valves, and brake chamber diaphragms are all susceptible to premature damage if the system is contaminated by moisture, leading to air system leaks. Check monthly for moisture in the system by opening the drain valves on the reservoirs. To keep the system dry, Bendix recommends the use of OE, oil-coalescing dryer cartridges, which best ensure the use of both reputably sourced and effective air drying technology. - At least once or twice a week, the following test should be conducted:
- Park the vehicle on level ground and chock the wheels.
- Build system pressure to governor cut-out, then allow the pressure to stabilize for one minute.
- Observe the air reservoir gauges for two additional minutes without the service brakes applied, watching for any decrease of the dash air gauge readings above 4 PSI, plus 2 PSI for each additional trailer.
- Apply the service brakes and allow the pressure to stabilize. Continue holding for two minutes, using a block of wood to hold the pedal in position, again watching for any decrease in PSI as noted above.
Haldex Tech Tip: Recommendations for complete brake maintenance
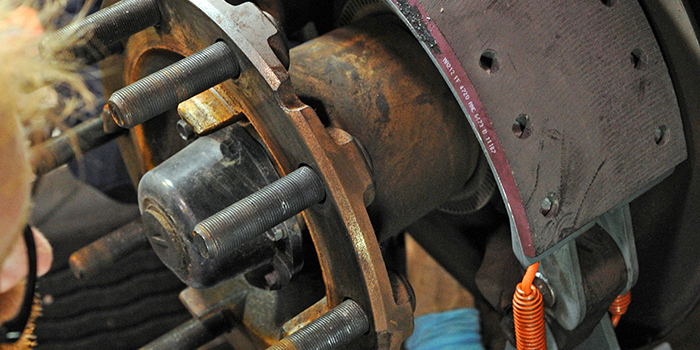
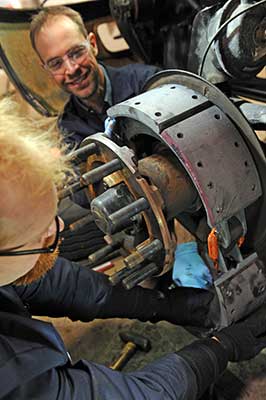
In conducting a complete brake job, disassembly can impact the assembly portion of the brake job process, all of which affects overall performance of your brakes. Be sure as you disassemble the brake to carefully inspect every part, checking for unusual wear. Part wear patterns can tell you a lot about the brake and the entire braking system.
Disassembly
It is important to note that most friction problems can be diagnosed by a close inspection of the old parts. Begin by checking the pushrod stroke.
- Check the pushrod stroke per CVSA checking procedures at 90 to 100 PSI reservoir pressure. Excessively long or short stroke can alert to problems that need to be addressed during rebuild.
- Before pulling the wheels, check each for end play and oil seal leakage. This may indicate seal problems or bearing/cup wear and/or adjustment.
- Inspect all shoes for even wear. If all brakes are not worn evenly, there may be failed or misadjusted components that will need to be corrected before assembly.
- Inspect lining surface for heat checking. If present, this indicates excessive heat due to all wheels not braking evenly, incorrect lining being used for the application, overloading or a combination of these.
- Check lining wear across each shoe. An uneven pattern or excessive grooves can indicate the drums need replacing. An uneven pattern can also indicate bent spiders or bellmouth drums, or weak shoe return springs.
- Inspect lining surface for grease or oil. Never reuse grease or oil soaked brake shoe. Grease or oil on the friction material will cause the lining to glaze and not do its share of the braking. Never do a one-wheel brake job.
- Inspect drum surface for even wear, glazing and/or heat checking. Heat checks, cracks and blue spots are indicators of excessive heat (hairline heat checks not over 1 in. are normal). Never reuse a drum if wear is over .080, several heat checks are aligned across the braking surface or hard spots exist.
- Check s-cam for wear at the inner and outer bushing surfaces, s-cam head and spline areas. Worn s-cam or worn s-cam bushings will contribute to longer than normal pushrod stroke.
- Check brake adjusters for proper settings and operation. Check clevis pins and anchor brackets for wear. Never mix automatic brake adjusters with manual brake adjusters, or use different makes of automatic brake adjusters on the same axle. Never operate automatic brake adjusters with worn components.
- Check the wear difference between the front and rear axle shoes (if relining a truck or trailer). If the wear is not equal, this can indicate an air timing imbalance or different rated friction materials. Check for inconsistent use of elbows in air lines (90° elbow is equal to 7 ft. of extra hose).
- Inspect spiders. Pay special attention to the anchor pin-hole area and for squareness and s-cam bushing bore, and to anchor surfaces that are not replaceable.
Reassembly
- Be sure to: Select the proper friction material based on your type of loads, application, duty cycle and operating terrain. Consult your supplier if you have any questions. Many shoes look alike, especially the new extended service design. Therefore, be sure to install the same shoe that is removed.
- Always replace all shoe attaching parts, anchor pin bushings, cam bushings and oil seals. All parts being reused should be cleaned with solvent, rinsed and dried. Replace s-cams, bearings and cups, as necessary.
- Lubricate anchor pins, brake rollers and bushing area of camshafts. Never lubricate the face of the roller (contact point with the s-cam). Only lubricate the bearing area of the roller that contacts the shoe web.
- Install new drums, if necessary. Do not mix light- and heavy-duty drums as this will result in uneven brake shoe wear.
- Lubricate axle spindle to insure bearings slide on easily. Slide hubs on to the axle far enough to be able to install the inner and outer bearing and inside axle nut. Never slam the hub onto the axle. Adjust bearings to manufacturer’s specifications. Install spacer/lock ring and outer nut (if applicable) and new hub cap gasket. Ensure proper hub oil or bearing grease, depending on the type, is applied.
- Always adjust all brake adjusters on all wheels of the vehicle. Adjust all manual brake adjusters for .015 drum clearance. Automatic brake adjuster drum clearance is .018-.025 (check manufacturer’s specifications for proper setup). Follow the same procedure for each brake adjuster on the vehicle.
- Inspect all brake hoses leading to chambers, replacing if cracks are found.
- Inspect all spring brakes for center seal leakage, replacing if needed.
- Check brake release. If slow on the trailer, install a quick release gladhand on the service side of the trailer to speed air exhaust.
- Inspect spring brakes for proper installation of rubber dust plug in release tool hole.
- If you replaced any brake chambers, ensure you did not mix sizes. Never mix long stroke with standard stroke chambers on the same vehicle.
- If relining a trailer, replace both gladhand seals.
- Always road test after reassembly to check for satisfactory brake performance. Automatic brake adjusters are typically backed off half turn from lining contact. Final stroke will not occur until brakes are cycled and lining is “burnished in.”
- Re-examine wheels for excessive end play.
- Re-check brake adjusters and chambers for proper and equal stroke.