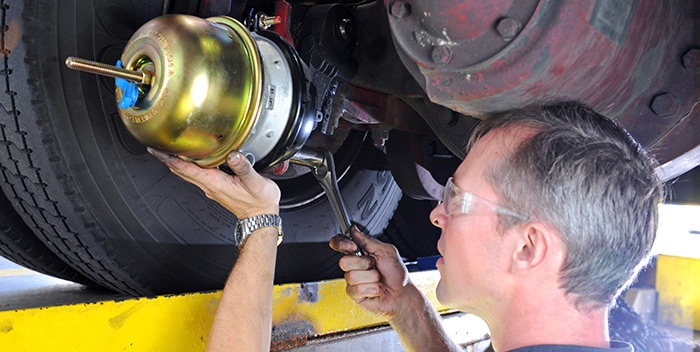
While every part of a commercial vehicle air braking system is important to safe and effective operation, air chambers have a uniquely vital job: At each wheel-end, it’s the air chamber, sometimes called the actuator, that transfers air pressure into a mechanical force, which is then translated into the brake application of an S-cam drum or air disc brake. As part of its Tech Tips series, Bendix offers tips on air chamber maintenance, including replacement and clocking a new chamber.
Where to start
How do you know it’s time for a new chamber? Many problems can be easily noticed during pre-trip air system tests and visual inspections: Audible air leaks around the chamber; missing parts such as dust plugs, caging bolts, and clamp bands; or obvious damage to the chamber. “Look for visual damage to the chamber, such as dents, corrosion, and bent pushrods. Missing dust plugs or loose band clamps can allow contaminants such as water and dirt to get inside the chamber, increasing the chances of corrosion on the power spring or pressure plate, and affecting the brake diaphragm as well,” said Kevin Pfost, technical service coordinator for Bendix Spicer Foundation Brake. “A loose caging bolt that rattles around during travel can damage the housing, potentially creating holes that can also lead to corrosion and leaks.”
Routine maintenance checks can also point to a chamber in need of replacement—like signs of a dragging brake, including continuous marking on an air disc rotor or hot spots on a drum brake.
Putting things in place
Like-for-like replacement is key: Selecting a chamber with a different pushrod length than the OEM specification may not create noticeable short-term problems, but over time, the difference in application force will lead to braking performance issues and, potentially, pushrod failure. If you’re working on a drum brake, determine whether the brake assembly is using a 5.5-in. or 6-in. slack adjuster. The mounting bracket includes holes to position the chamber correctly for either slack length, so it’s important to place it in the proper chamber mounting holes.
“Always remember to empty all primary and secondary air tanks before working on the brake assembly,” Pfost said. “Additionally, if you see structural damage to a spring brake chamber, do not mechanically release (uncage) the spring. It’s also helpful to take a moment before removing the old chamber to note the bolt and port locations and orientations. This will make installation and orientation of the new chamber easier.”
A note on installing spring brake chambers for parking brakes: Make sure the new chamber’s power spring is caged, so it’s not putting pressure on the pushrod during installation. Most chamber manufacturers ship their chambers already caged, but it’s a good idea to double-check before beginning the installation.